Last updated on February 14th, 2024 at 08:02 am
Nat shares her top bottle feeding hacks and tips in this Facebook live video, sponsored by Dr. Brown’s. For more info, visit drbrownsbaby.com. Scroll below for the video transcript.
Hello everybody! I am Natalie Diaz, founder of Twiniversity, big cheese and author of a little book called What to Do When You’re Having Two!
Every once in a while, we jump online, and we talk about Dr. Brown’s—a longtime partner of ours and one of personal my all-time favorites. They were exclusively who my twins used when they were super tiny and now, I get to keep spreading the word with you guys.
We are talking about hacks today. We are talking about tips today. We’re giving away prizes today.
This is the Dr. Brown’s bottle, and why it is so unique is because it has this venting system that is in the center. Now, this venting system gets rid of a lot of air that is in here, making it easier for our babies to drink out of it and therefore have fewer issues—especially with colic. They do make a preemie bottle—one of the only companies that makes a preemie bottle.

These are the Options bottles. They have the green venting system.
If your baby doesn’t truly need them, I don’t think you can really understand the benefit of them, but as a mom of a child with severe reflux (she was on an apnea monitor and it was very, very bad) for the first 7 months of my daughter’s life, [I really understand the benefit of the venting system]. My twins were born at 34 weeks and my daughter came home from the hospital after a month. I never really liked breastfeeding, but I did exclusively pump, and when I was in the hospital, they recommended that I go and get these Dr. Brown’s bottles.
They do sell the venting system separately, but you need the Options bottle to use it. I strongly recommend that if you are buying new bottles that you buy the green venting system because that means the bottle can be used with or without the venting system. The “old” version is the blue venting system. So, if you got hand-me-down bottles, they are perfectly good, but you cannot use the blue bottle without the venting system. The Options bottle literally gives you the option to use it with or without the venting system.
How Many Bottles Do We Need?
We recommend that you start off with at least 16 bottles, because that’s how many feeds a day you are going to be doing. You’re going to come home from the hospital and be on a 3-hr feeding schedule. So, for the first month, you are going to be doing a feed of your twinnies every 3 hours, 24 hrs a day. That means that you will need that many bottles for the day, unless you want to wash them.
I did use these bottles exclusively. As a mommy of preemies, I was told: “get those bottles”! At the time, we weren’t using the preemie bottle, we were using the Level 1 nipple…which brings us to our first tip.
When Do We Change Nipples?
How do I know when I’m going to go from a Level 1 to a Level 2? Or when am I going to go from a preemie to a Level 1? First you need to know what nipple you are currently using; if you have a brand-new bottle off the rack it is going to come with a Level 1 nipple.
On the nipple it will be written what “flow” it is. Everybody starts off with a Level 1 if you’re buying bottles that are new. You need to speak to your doctor before changing nipples because if you’re baby has a feeding issue or if your baby has any oral motor issues, that could be something they want to address.
Switching nipples is not something that I recommend that you just do on your own. You should always speak to your doctor when moving from one level nipple to the next level.
You can start off with the preemie if necessary but you do not have to start off with a preemie—I actually recommend that you start off with a Level 1. The level is equivalent to the flow; 1 is the slowest, 2 is faster, 3 is faster and 4 is the fastest. There are 5 levels in total; preemie through Level 4.
If you are expecting, when you are registering, please make sure that you are registering for different level nipples! We’re going to get our Level 1 nipple that comes in the box and then we’re going to also register for some Level 2 and level 3, that way you know that you have them in the house.
Again, I suggest you do not change the level nipple until you speak to your doctor. And when you do change the level of your nipples–whether you go from a preemie to a 1, or a 2 to a 3, do not trash the old nipples until you are really comfortable in your new level nipple. When you transition, you’re so excited to have a transition that you may quickly toss these in the trash, but you do not know how your baby will take to the new level so do not toss these in the trash until you are comfortably settled.
Also, never throw out a few Level 1’s. You’ll want to keep some Level 1’s because if you ever are planning on flying with the twinnies a Level 1 will take more effort for them to draw the milk out (or whatever fluid is in there), causing them to take smaller sips, causing them to gulp. The more that we gulp the more it cleans out our ears. So, if you get that airplane clog or you live someplace with a higher altitude or you’re traveling someplace with a higher altitude please make sure that you keep some Level 1 nipples because it will cause the baby to take smaller sips, sipping more, gulping more and clearing out their little baby ears if they get too pressurized.
We use so many bottles and it can feel like such a pain to clean all these pieces. There are a lot of components to this, but I will tell you—I swear to you on a stack of bottles—it is worth the effort. This truthfully was one of the only bottles that my daughter could use when she was under 6 months that she wouldn’t lose her entire feed. So please make sure you are using the correct bottle for your baby especially if your baby has feeding issues like mine did.
Making Bottles
I am definitely a dedicated Similac person. As far as formula goes the “pro-advanced” has this thing called HMO which is Human Milk Oligosaccharides and the closest thing we can get to breastmilk. If you are going to use formula it’s definitely one that I would strongly consider, and you can, of course, speak to your doctor and they will give you the full scoop on that.
I always recommend—and it’s not just me it’s our Twiniversity team—when you are making a bottle always use the powder. The ready-to-feed has more preservatives in it because it just must be better preserved because of bacteria growth and such.
Let’s say in the morning we’re taking these out of the dishwasher—top rack, dishwasher safe—you are totally fine. The Dr. Brown’s bottle has 5 pieces: the bottle, the two venting pieces, the nipple, and the collar. You’ll want to buy the dishwasher basket because these little pieces can go rogue.
I suggest, in the morning when you get up, you take all your bottles out of the dishwasher and put all of your formula in there for the day. So if I’m making 16 bottles, I’m going to put all of the stuff into the 16 bottles right away. Do whatever is easiest for you—it will be a microscopic difference between adding the formula first or the water first. I say always add the formula first because it’s always easier to add the water.

Get Your Water Tested
Whether you live in a giant metropolis in the middle of Gotham or you live in the middle of nowhere and you have never even met your neighbor because they’re too far and you just can’t do it, have your local home water tested. You can buy a water testing kit on Amazon, you can go to Home Depot, or you can call your city at 311 and have your water tested.

I think everybody should have their water tested whether you’ve lived in this house for 35 years or you just moved in yesterday it’s important to make sure that the water coming out of your faucet is safe for everybody to drink.
Making the Bottles
My hands are clean, my bottle is clean—sterilized or not is entirely up to you.
When putting the venting system on, make sure it is pushed down 100% all the way. Please make sure your vent is on correctly, then get the collar with the nipple and screw it on. Paws clean, hands on top of the nipple and [shake]. You really want to shake your bottle to mix the formula vs. swirl it. Look to make sure that the solid formula is underneath the bubbles. Make sure that there’s no clumps–look at the bottom of the bottle to make sure that nothing is sticking to it.
Only Buy the 8 or 9 oz Wide Neck Bottles
We did a price comparison. Truth be told, these are not that huge of a price difference between a 5 oz bottle and a 9 oz bottle, and which do you think you’re going to use longer? We’re going to be using the 9 oz for a lot longer.
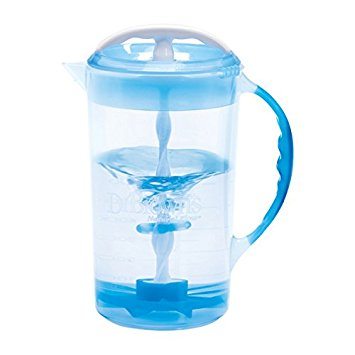
Formula Pitchers
Any thoughts on mixing formula a pitcher at a time or using the Dr. Brown’s pitcher? That is definitely one option. There may be a new option in which we could eliminate the bubbles, we could eliminate the measuring…we are now playing with Baby Brezza Formula Pro Advanced Mixer which is really exciting. In Twiniversity classes this is probably one of the things that comes up the most: do you buy a formula maker? I say honestly, yes! If you have the budget for it, I definitely think this is a good way to go and you can use the Dr. Brown’s bottles with this with no problem. It makes the formula in seconds, there’s three different temperature settings (warm, cold or room temperature), it works with all major brands of formula, it’s fully digital…you can put any size bottle in here and tell it how many ounces you want made. So, my one issue, if I had to have an issue, is that you can only use one formula; it doesn’t have two different formula things so if you have twins on two different formulas that may be an issue. The water tank holds 50 oz, it’s the bottle warmer, it’s the bottle maker, it’s the formula mixer—everything all in one! You can’t beat that.

This one is $199. They do make them less expensive but my opinion is if you’re going to go for it just really think about going for the bigger one because it has the bigger reservoir, so you’ll have to fill it up less.
Paced Feeding
We talk about this in our online breastfeeding class. If you are exclusively bottle feeding, a lot of people are like “chug chug chug chug chug”! Do not “chug chug chug chug chug” at first. Start slow and steady. Instead of having your baby gulp, you have the baby choose how fast they are going to drink a bottle. This is especially important if you have babies that have reflux or if you’re doing a combination of boob time and bottle, because when you have the baby to the tap, so to speak, they really do have to draw the fluid out of your body. It doesn’t just kind of leak into their mouth. But even on a Level 1 bottle it still is going to flow out–not fast, but enough that you want to try to do paced feeding to mimic the natural flow.
Hospital Bins
When you’re in the hospital they typically have these bins that are used for washing your baby or as a basin for you taking a sponge bath…bring it home! If they don’t give you one you can ask for one. But once you’re home, fill it up with sudsy water and put it into the sink. As you go through your bottles during the day and take all the pieces apart, put them into the sudsy water and that way you will always be able to get the grime out of the bottom.
When you get your Dr. Brown’s bottles, they come with a cleaning tool that will clean all the pieces—they can be used to scrub the nipple, the vent, all the little pieces. This is really important because the vent can get super gross. It’s very important that you use the bottle rack because if you put the vent on the spindle of the dishwasher no water is going to pass through the venting system. So, get the bin, soak things up and make it all easier to clean.
Count Your Bottles
If a bottle goes rogue and rolls under the couch it is going to smell like a dead animal for day, so at the end of every single day, because you have so many bottles, count your bottles! Soak them in the sudsy water, count them and then load them in the dishwasher. If you are going to hand wash them, I do recommend that you use a bottle soap, something specifically made for baby bottles. We can use Dawn or Palmolive, but I honestly believe that some soaps can be a little too harsh. We don’t need anything that significant. Dr. Brown’s does make a soap, or you can buy some kind of other organic soap but try to get something that is more plant-based. Do you have to worry about this in the dishwasher? Not so much because the rinsing cycle of the dishwasher is very different than the rinsing cycle of your sink. So just know that if you’re going to handwash bottles, really consider using a soap that is a little more environmentally friendly, or I like the plant-based ones, and Dr. Brown’s does make one and it smells absolutely fantastic.
Other Dr. Brown’s Products
If you take our expecting twins class online, you actually leave with a giant swag bag which includes Dr. Brown’s bottles because they are so generous and in addition to the bottles, they give us other products to giveaway too. I don’t know if you know but Dr. Brown’s makes more stuff besides bottles: they make the transition sippy cups, they made transition spouts which you can use with your Dr. Brown’s bottles to help your kids transition to sippy cups, they make pacifier wipes, they make nose and face wipes and micro-steam bags which are absolutely fantastic.
, Blue, Single")
We have to wrap this up but we had so many other tips to give you including:
- How to tell bottles apart if your kids are using different formula (my quick thing is use nail polish, Mabel’s Labels or Dr. Brown’s makes bands)
- Get rid of the vent as soon as you can (but speak to your doctor beforehand)
- Use BPA (bisphenol A) free bottles—basically BPA has been linked to fertility problems, male impotence and heart defects. It’s an industrial chemical and it gets seeped into food. It has a super negative effect on infants which could cause brain issues, developmental issues, etc. So, we always want to use items that are BPA free.
- For those that may want to use glass bottles, remember glass is really heavy and it’s going to take a really long time for your twinnies to hold their bottles on their own.