Last updated on October 6th, 2021 at 03:11 pm

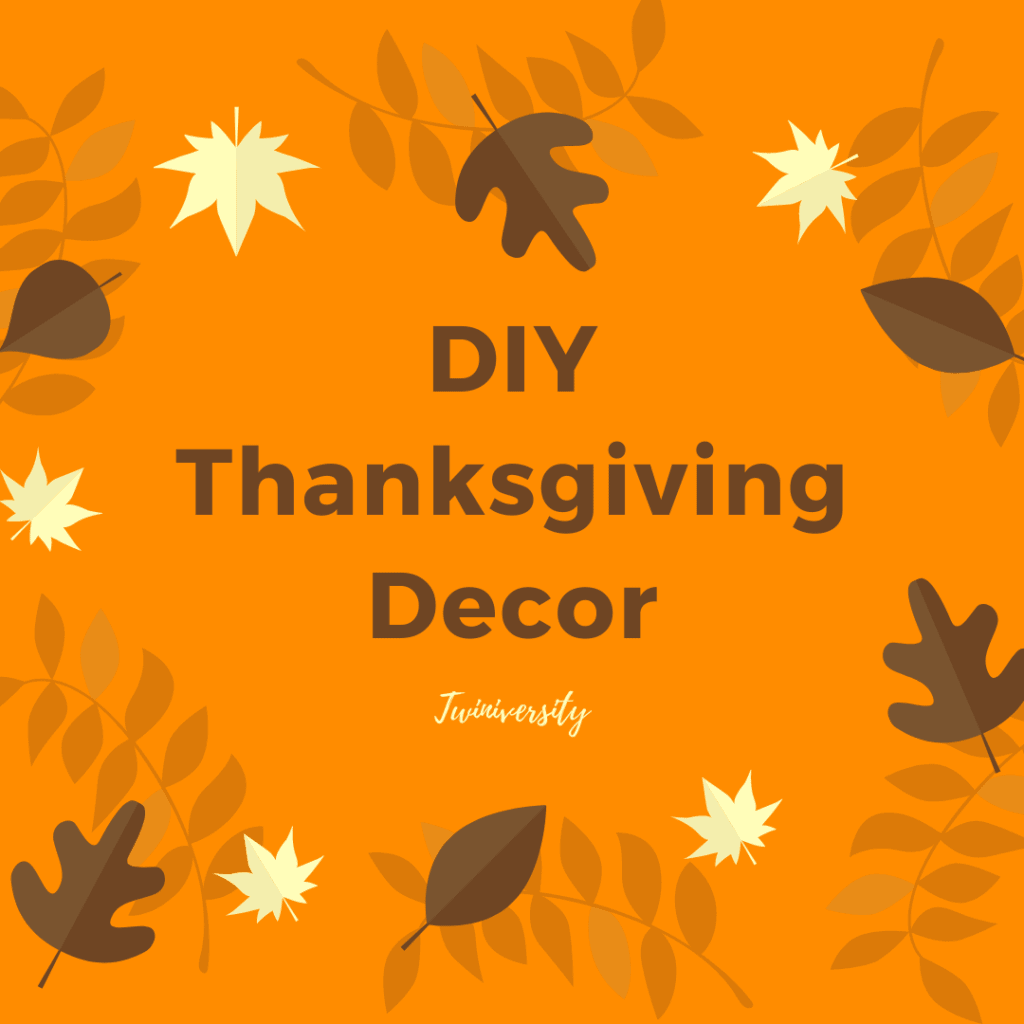
Looking for a way to keep little ones busy this fall? Check out these Thanksgiving DIY crafts that your kids can proudly display at the table.
Growing up, the other kids thought I was crazy because Thanksgiving was always my favorite holiday – and it still is today! There’s no stress of holiday shopping or gift-giving and it’s a holiday revolving around making and eating delicious food and slowing down with your family. What’s not to love?
In our house, Thanksgiving is all about family, and what better way to celebrate that than with these fun decorations you can make together! They are not only cute and fun to make, but they are so simple that even toddlers can help! Plus, you can use them as a great learning tool with young children. You can explain to them all about the first Thanksgiving with the Pilgrims and Native Americans, you can tell them about your Thanksgiving and traditions when you were growing up and talk to them about some of the traditions you have started in your family.
A few quick tips for doing Thanksgiving DIY crafts with your children:
- Choose age-appropriate crafts! Toddlers will lose interest quickly if all the steps are so complicated that they are unable to do anything themselves.
- Have everything prepared ahead of time. Little kids have short attention spans so have all your supplies laid out and shapes cut out before you begin.
- If there are adults only steps have a coloring page for them to work on or another step they can do while they wait.
- Let go of perfection! In the end, it doesn’t matter if they do the craft ‘correctly’ – it’s just for the fun and memories!
- Let them display their projects for all to see! Encourage their creativity!
Thanksgiving DIY Decorations to Make With Kids
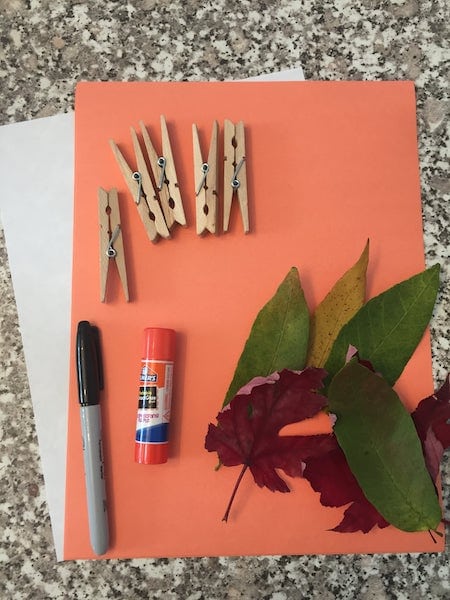
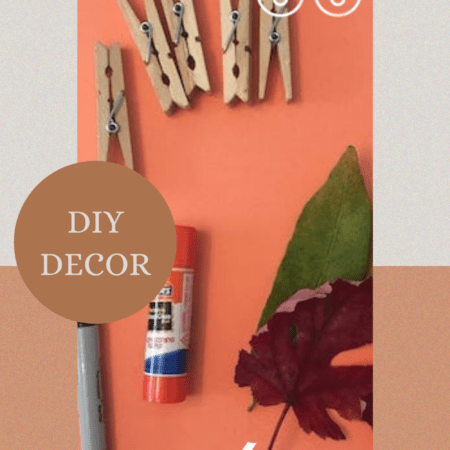
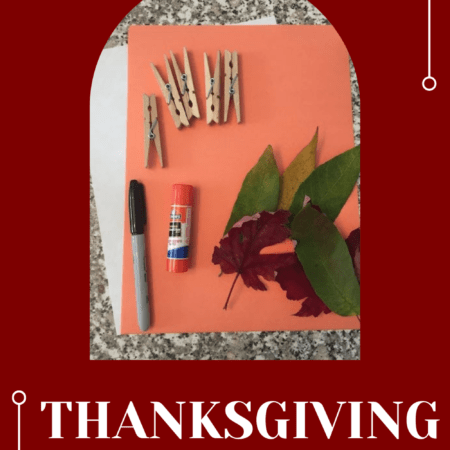
Turkey Place Card Holders
You need:
- Clothespins
- Leaves (real or fake!)
- Glue
- Black marker
- Construction paper – white and orange
- Cut an orange beak and two small white circles for eyes out of your construction paper. Use your black marker to draw pupils for your turkey.
- Glue on your eyes and turkey beak.
- Fan out your leaves and clip into your clothespin. Clip a place card over the top!
- Lay out or stand up on your Thanksgiving table!
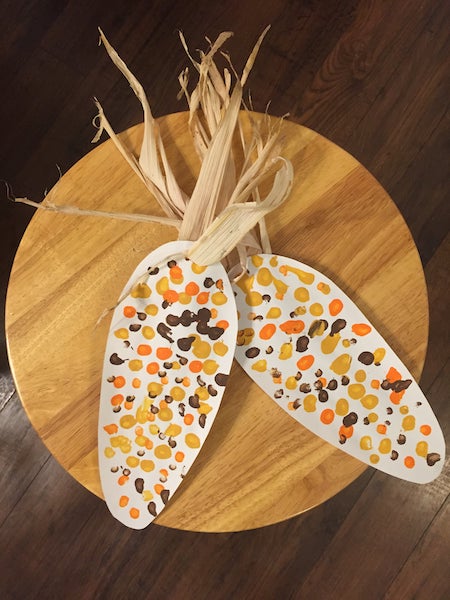
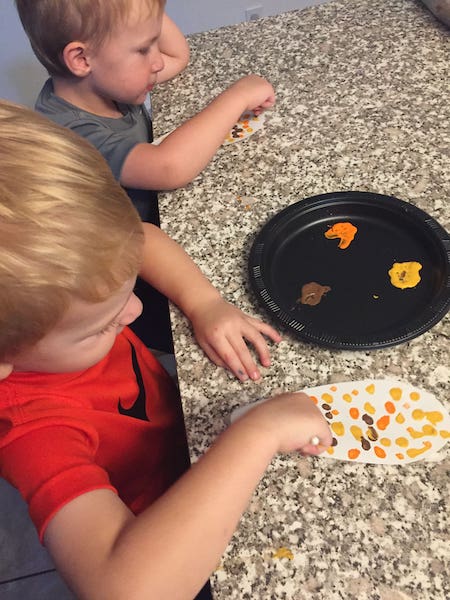
Indian Corn Décor Craft
You need:
- Q-tips
- Yellow, orange, and brown paint
- White construction paper
- Material for corn husk (could use real husk, raffia, straw, or even burlap!)
- Hole punch

1. Cut out shapes of corn out of the construction paper.
2. Use Q-tips to make individual corn kernels on the paper. Alternate the three colors. Let dry.
3. Punch a hole at the top of the corn.
4. Feed corn husk/raffia through the top of the corn. Tie in a knot or tape to hold.
5. String to another piece of corn or even make a whole garland to display!
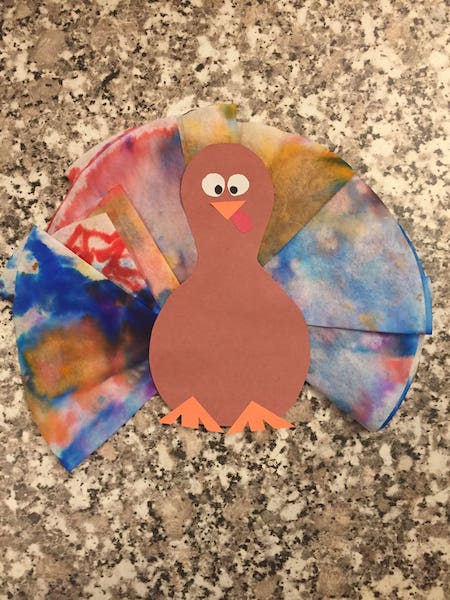
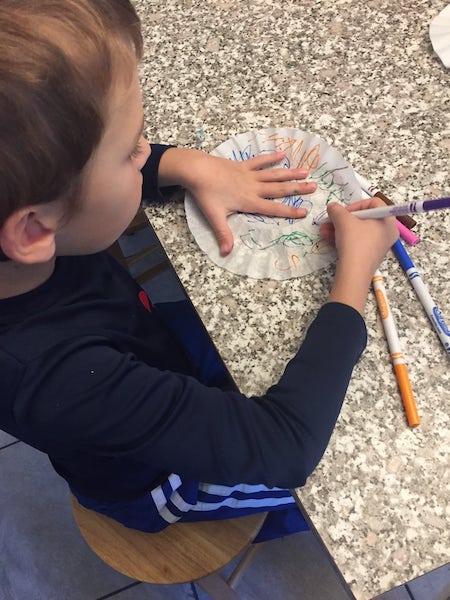
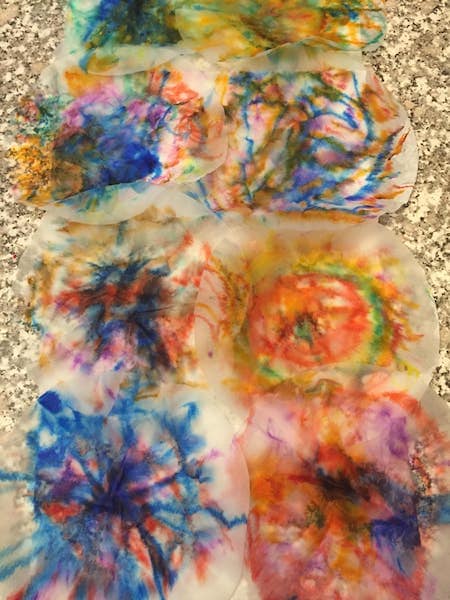
Coffee Filter Turkeys
You need:
- Coffee filters!
- Construction paper- brown, red, orange, white, black
- Washable markers
- Spray bottle with water
- Glue
- Paper towels (optional)
1. Have the kids color the coffee filters – making sure to get the edges.
2. Lay the coffee filters down and spray water on them until the colors start to bleed. (We laid ours on paper towels to absorb the water.) Let dry.
3. Cut out the body, eyes, beak, feet, and gobbler for your turkey. Glue all parts together.
4. Fold your coffee filters loosely like a fan and glue to the back of your turkey. We used 4 filters for each turkey!
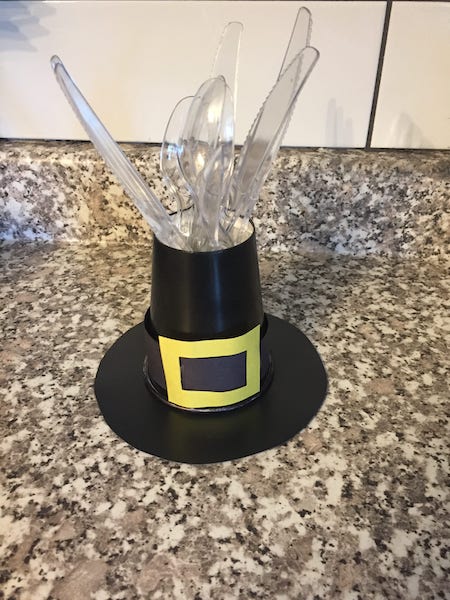
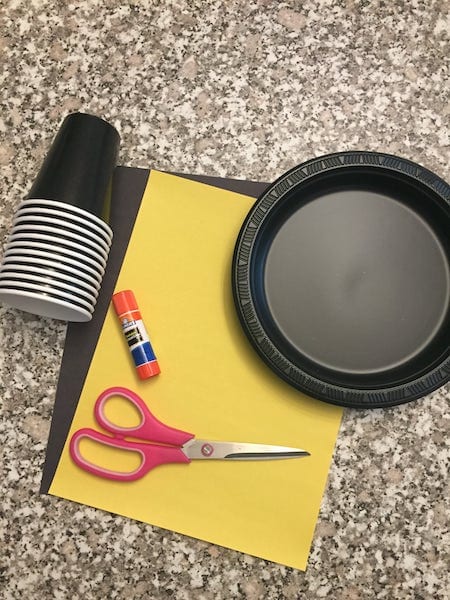
Pilgrim Hat Utensil Holder
You need:
- Black paper cups (If yours has a white lip as ours did, just fill in with a black marker.)
- Small black paper plates
- Glue
- Construction Paper (black and yellow)
- Scissors
1. Using your scissors, cut the bottom out of your cup.
2. Cut a small strip of black paper and a yellow buckle out of the construction paper.
3. Wrap black paper around the cup and glue in place. Glue the buckle on top.
4. Glue your cup to the middle of your plate. (If your paper plate seems disproportionate in size to your cup, trim the plate down.)
5. Fill the cup with silverware, crayons for the kids’ table, or anything else you’d like!
If you try any of these Thanksgiving DIY decor ideas, don’t forget to tag us on social media for a chance to be featured on our IG or FB pages!
Happy Thanksgiving decorating!
Recent Posts
- Twin Parent Reviewers Needed
- How Far Apart Were Your Twins Born?
- Best Twin Breastfeeding Chair
- Why Every Twin Family Should Invest in a Single Stroller
- Tongue and Lip Ties in Twins

Amy Cook is a Midwestern wife and mom to four boys ages 6, 4 and 2-year-old fraternal twins. She has a degree in Biochemistry and worked in research for 8 years before becoming a SAHM when her twins were born. Amy loves to bake, design prints for her Etsy shop, and spend time with her family. She writes her personal blog, Loving Our Messy, to encourage new moms, share DIY renovations of their home and adventures as a boy mom. You can also find her on Instagram.
Related Articles
Top 10 Posts To Get Ready for Thanksgiving